You are here
Servo controlled Robotic arm.
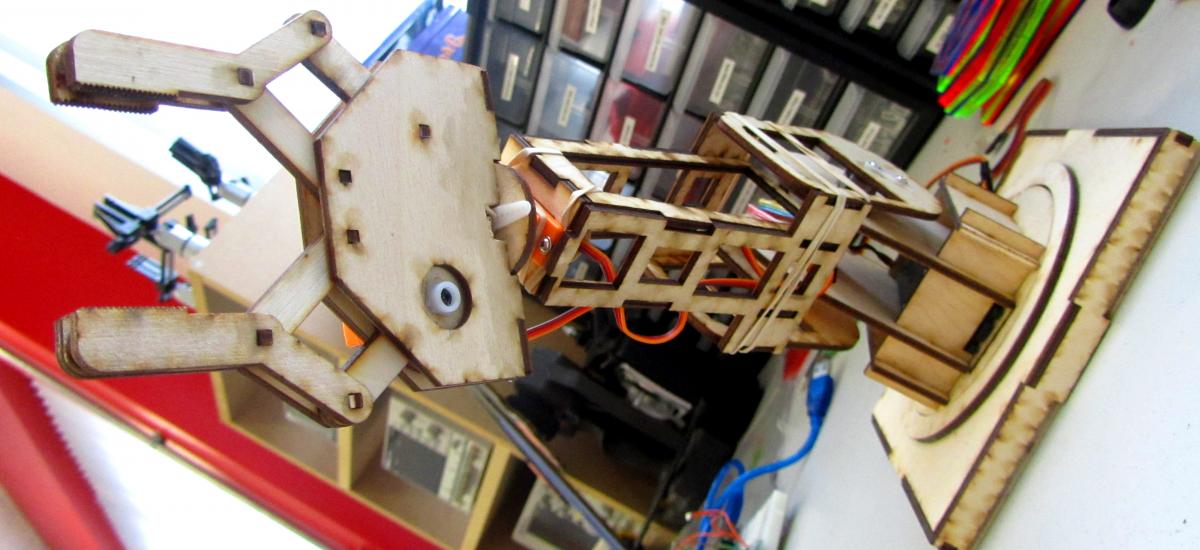
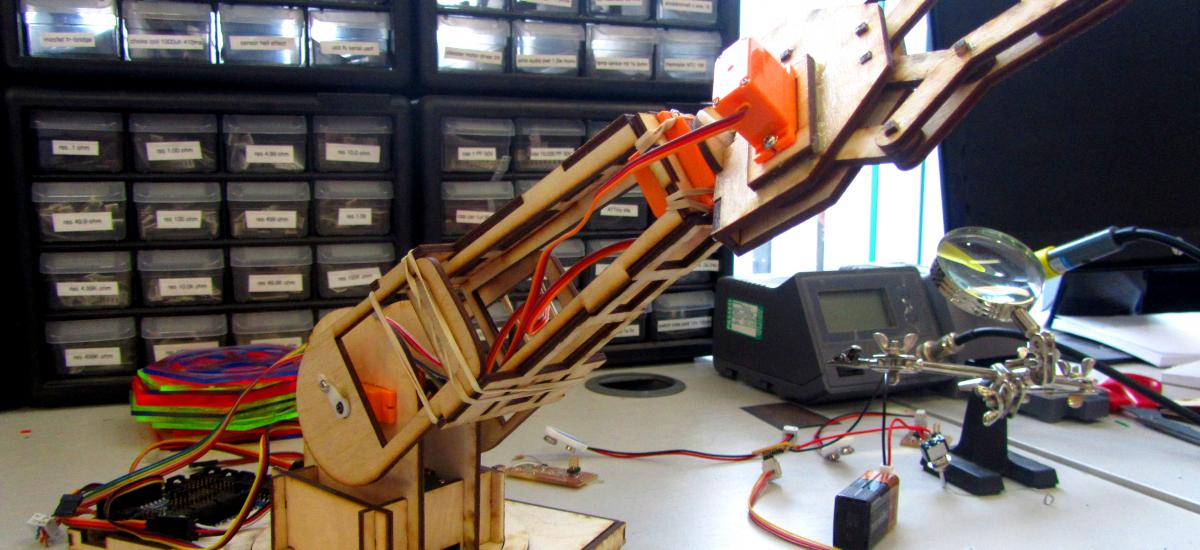
This is a prototype of a robotic arm moved using servos which are controlled by Arduino through the computer.
There are many ways of making a robotic arm to show the Arduinos capability in controlling servos. I used an Arduino Uno R3 with a sensor shield. However this project is possible to some extend without the sensor shield using the available 6 pwm ports on the Arduino.
After obtaining your arduino download the software and install it. Connect the servo to the 5v and the ground on the Arduino and the control wire to Digital pin 9. Then open up the Servo example from the Arduino libraries. There is one called sweep which allows you to manipulate the servo in speed, degrees of freedom and resolution. This is a basis for the robotic arm. Using the code you can simply add more servos. It is important to declare these in the code so where “myservo” is introduced you may want to copy that and add “myservo2” and continue down, you can now have 2 independantly moving servos. The principle is the same for any extra servos you may wish to add. Just remember to connect these to the correct PWM pins on the Arduino Digital pins 3,5,6,9,10 and 11.
Now you have your servos you are ready to design your robot around these. It is possible to make many different types, I chose to make a robotic arm using 6 Servos.
It was constructed using laser cut 3mm plywood and each servo was mounted and an extension cable running from the servo to the arduino.


,%20Helena%20Hamilton,%202013_0-itok=4nAAwk15.JPG)